ICC profiles are integral part of any Windows operating system. It is a file responsible for your monitor or display’s color ID. It basically renders the right colors for one particular device – even printers have their own ICC profiles. Basically, if you want a picture perfect output, you have to calibrate your display no matter what. A prerequisite for serious photographers and editors alike.
Windows operating systems had their own default ICC profiles for most devices but these defaults are simply not enough. Monitors in particular requires calibration to output optimal colors – thus the reason why calibrating devices uses ICC profiles as a solution. No amount of OSD tweaks will measure up to a calibrated ICC profile.
Since we have a number of monitors reviewed and we got some ICC profiles saved, we decided to put up our own guide on how to install them yourself. Make sure to follow the steps carefully and have your chosen ICC profile ready. This guide only applies to Windows XP, Vista, 7, 8, 8.1 and Windows 10.
Table of Contents:
1. Apply the OSD Settings Matching the Downloaded ICC Profile
A calibrated ICC profile is pretty much useless on its own. As much as possible, try to use the same OSD settings the calibrated monitor used. Make sure that you are using the exact model of the panel or monitor where the profile came from. The most important settings to look out here are the following:
- Brightness: Usually displayed as a percentage.
- Contrast: Usually displayed as a percentage.
- Saturation: Usually displayed as a percentage.
- Temperature: Could be a preset or RGB values in percentage.
- Gamma: Usually a preset in 1.8, 2.2, and 2.4.
- Preset: Overall preset used before touching the settings stated above.
Our monitor reviews have these settings jotted out for convenience. Our target for calibration is a 2.2 Gamma value, with a White Point at 6500K. Brightness value on the other hand is set at 120 cd/㎡. Calibrated values were taken from the Data Color Spyder5ELITE Display Calibration System.
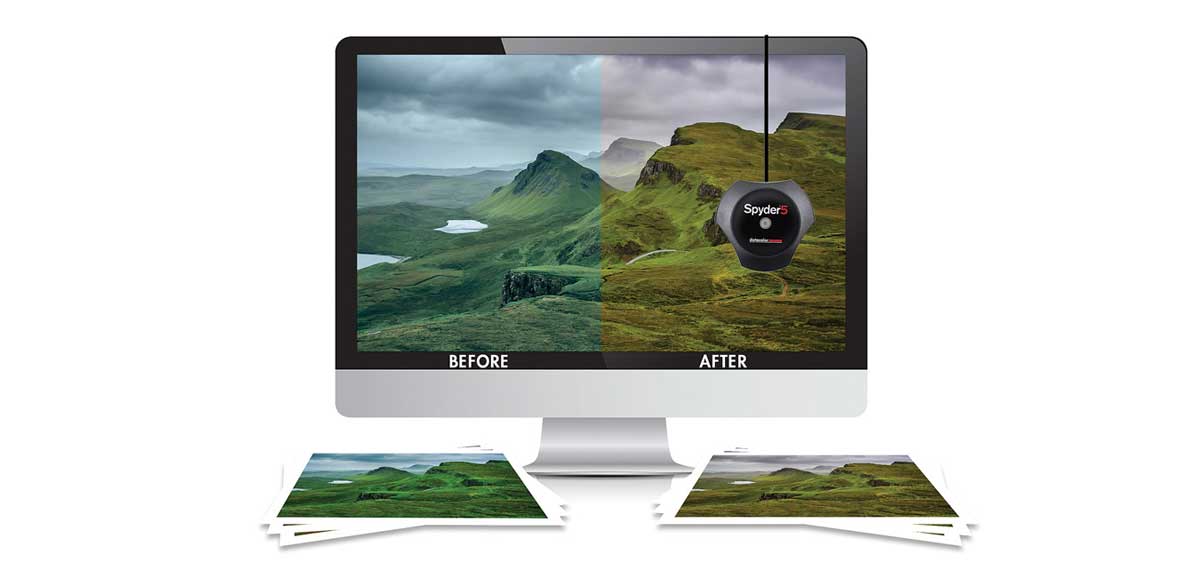
There is a terrific profile database at TFTCentral complete with the OSD settings to boot. Once you got the OSD settings of the monitor matched with the ICC profile, it is time to do some work with the Color Management window.
2. Open up the Color Management Settings (Windows)
The Color Management Settings is where we will pretty much stay for the rest of this guide. You may open it up via Windows 10 by typing “Color Management” on the search bar. If the search bar is not available, or if it is not showing when you search try to open it up on the desktop.
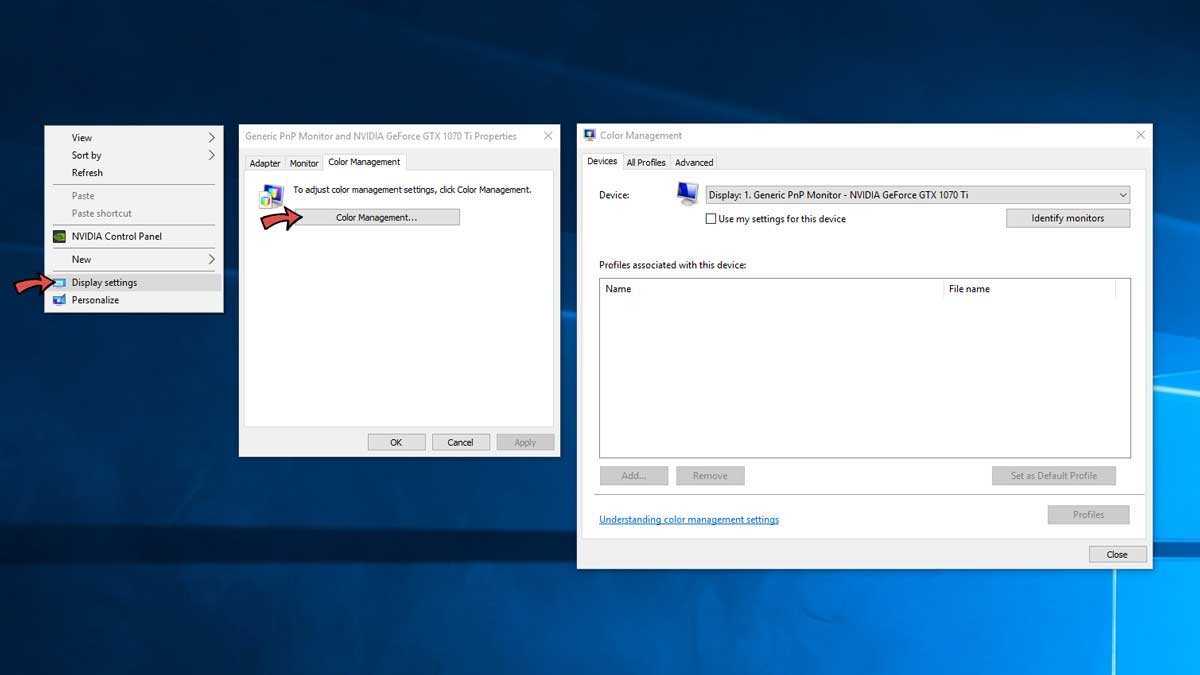
If you are still one of those guys who uses older versions of Windows then follow these steps:
- Recent Windows versions: Start Button > Control Panel > Appearance and Personalization > Adjust Screen Resolution > Color Management
- Windows XP: Desktop > Right Click > Display Properties > Navigate to Color Management tab
3. Load the Downloaded ICC Profile
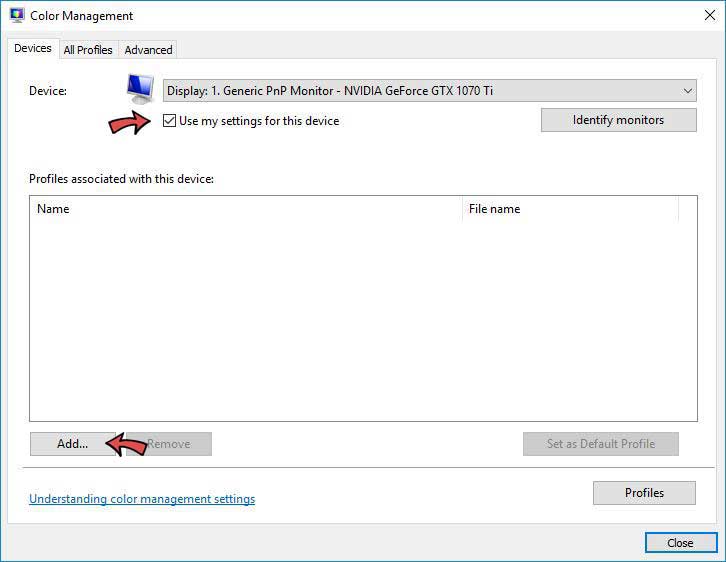
First up on the to do list is to select your device (if you have multiple displays). Check the Use my settings for this device and press the Add button.
Press the Browse button and locate the ICC profile you wish to use. Make sure to check the Add as Advanced Color Profile check box. Press OK to continue. Update: Add as Advanced Color Profile pertains to HDR related profiling. Leave it unchecked if your display doesn’t support the built-in Window 10 feature.
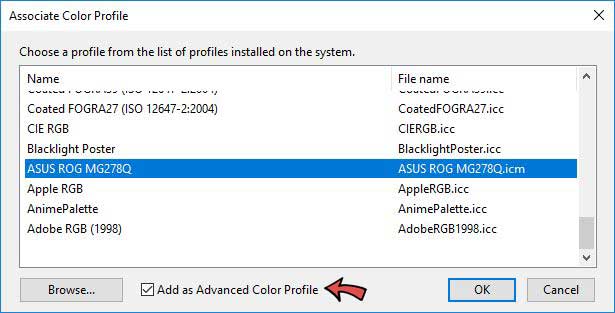
Once the ICC profile has been added, press the Set as Default Profile button.
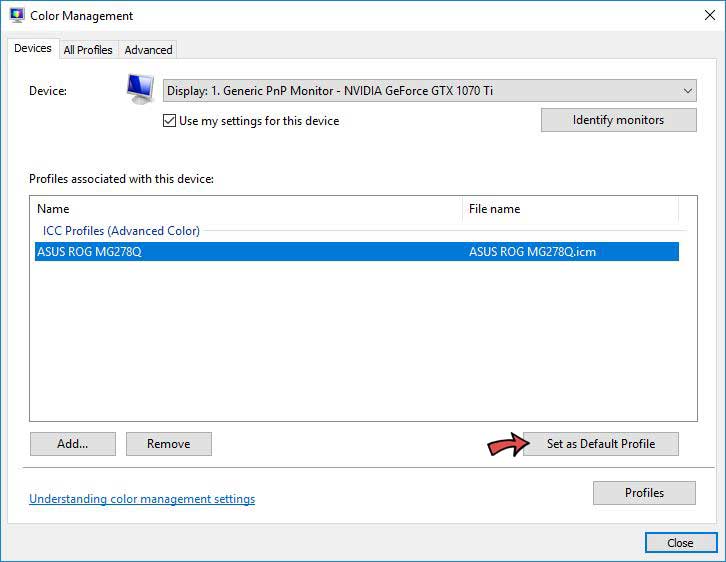
4. Change the System Defaults
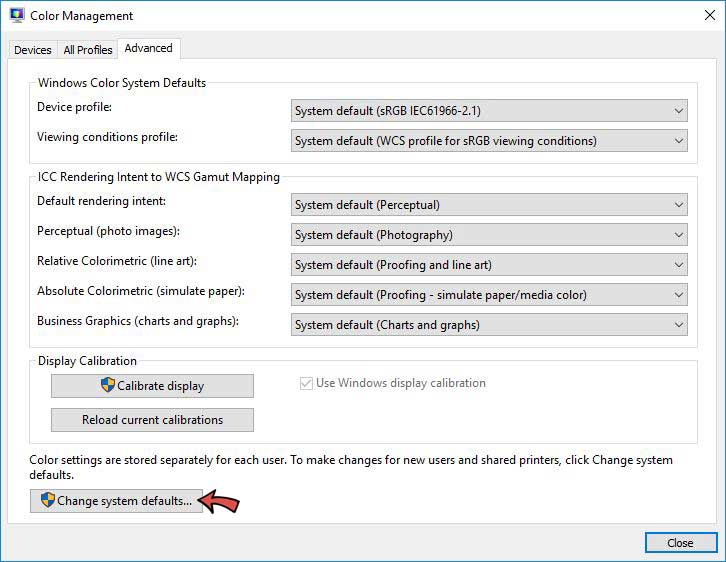
Now go to the Advanced menu. Make sure not to change any of the system defaults on this menu’s drop down lists. Press the Change system defaults button to get started.
This will open up the Color Management window for the System Defaults. Once opened, check the Use Windows display calibration check box. Close the window once you are done. Again, do not tamper with the any other settings on this menu’s drop down lists.
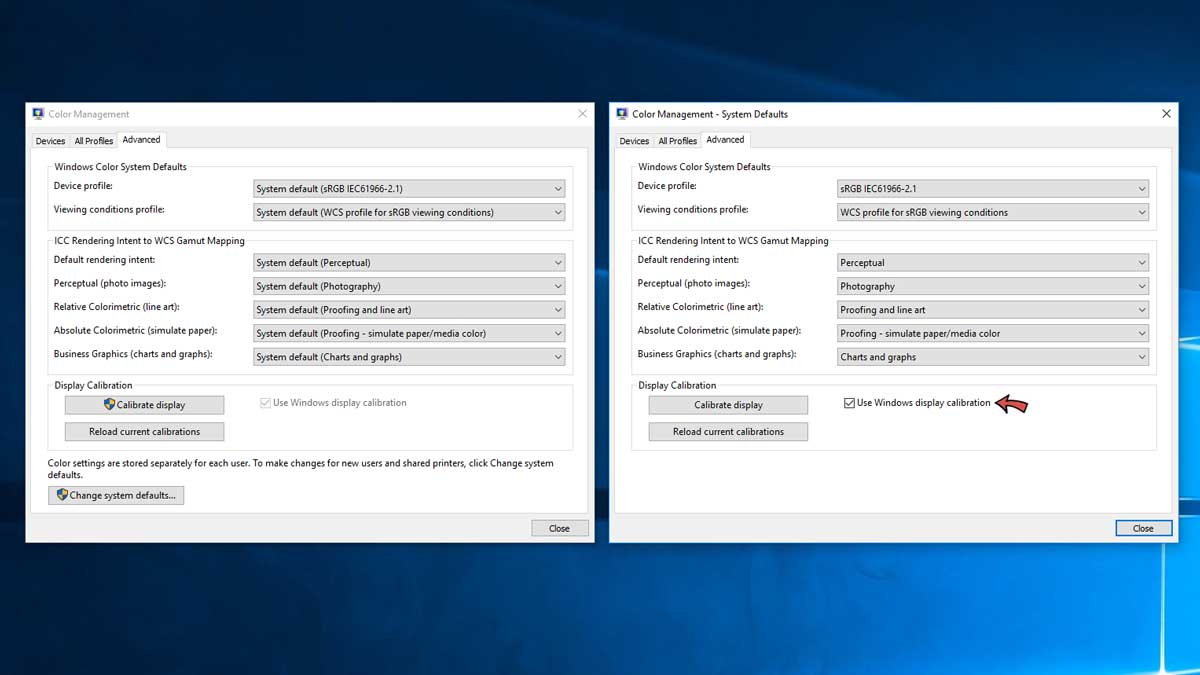
Now close the main Color Management window. Your new ICC profile should now be loaded. It’s time to re-check if it loads with Windows so restart the system.
Wrapping it up
Congratulations. You now have a calibrated display. Please do note that while this is a good practice, this is not in any way an equivalent substitute for a properly calibrated display. Don’t expect a 1:1 setup even though your monitor is identical to where the profile came from.
That said, it is still recommended to create an ICC profile yourself using a proper display calibrating tool like the Datacolor Spyder series. But then again, downloading an ICC profile and installing it properly is better than guessing or nothing at all.


Can you explain what “Add as Advanced Color Profile” checkbox means?
The profile wont take effect without checking the box.
I tried to do something similar with Calibri once. Now the dark colors are a bit too dark haha. Maybe these tools are not suitable for TVs. Or maybe I just suck at calibrating.
You need proper calibrated profiles and settings for it to work. :D