There are plenty of reasons to go with Raspberry Pi 2, the ultra-small Linux computer, but the best reason would be less bulkiness and better cooling than traditional servers. One single Raspberry Pi printed circuit board generates less heat and consumes far less power. Place one at home and you get great home or small-business servers in the smallest of packages.
For this walk-through, we will transform the Raspberry Pi 2 into an energy-efficient and yet powerful tiny remote backup location. It will accommodate and serve files over a secure protocol that provides a sufficient level of encryption to your connection, namely SSH.
What you’ll need:
- A Raspberry Pi 2 mini computer
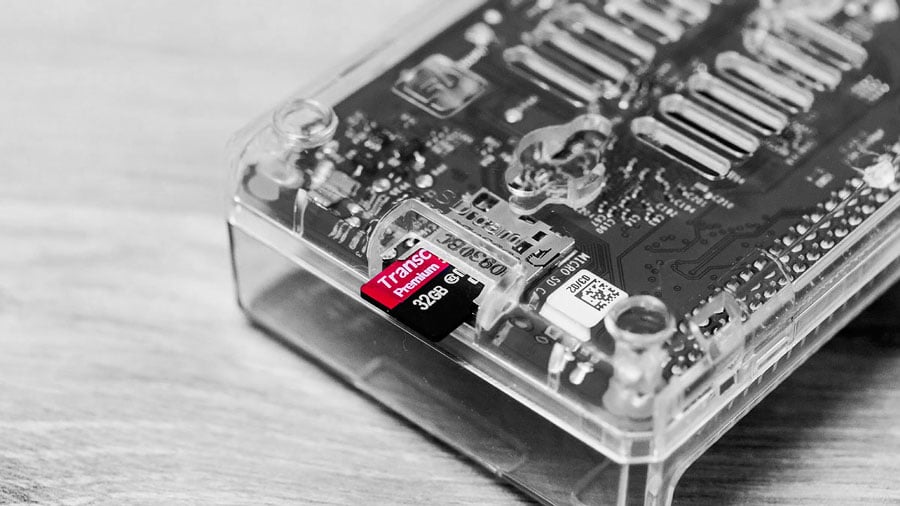
- An empty MicroSD card to hold Raspbian, the OS for the Pi
- An compatible Raspberry Pi power supply that provides good ‘juice’
- An Ethernet connection to a router
- Externally-powered USB hard drive
Table of Contents:
Step 1: Get Raspbian on a Micro-SD and install it
You will need to create Micro-SD containing the operating system, and it really is the simplest step of the process. Raspbian is a bundled collection of software based on the linux kernel, which is known as a distribution, or distro for short. For creating our mini Raspberry Pi 2 servers, we have decided to go with Raspbian, the default distro for the Raspberry Pi. With the OS on the Micro-SD card, you will be able to run the operating system from there. DOWNLOAD IT HERE
It’s an easy task, placing Raspbian on your Micro-SD card. There is a NOOBS method where you can simply un-archive the NOOBS ZIP file (holding Raspbian. Simply Google for it) into a blank fully-FAT-formatted microSD card. Once the loaded card is inserted into your Pi, a menu will prompt you on which distro(s) you would want to install. Choose Raspbian and you are all set!
- As a side note, you would want to check if your Micro-SD card has a drive letter assigned to it, before loading the operating system onto it in the first place. One way is to plug your Micro-SD into your Windows PC (on which you downloaded your Raspbian operating system into). You can simply see if the Micro-SD has been assigned a drive letter, if you can see it in Windows explorer.
- After which, download Win32 Disk Imager onto your Windows PC. This will create an operating system image on your MicroSD. Extract Disk Imager onto your desktop, but only run it as an administrator (right click and select “Run as Administrator”).
- Now, it becomes the simple matter of selecting the image file of Raspbian within disk imager. Select the right disk letter that was allocated to your MicroSD card. It is important to make sure of the particular letter as the contents of your MicroSD card will be erased as part of the writing process. Click on “write” and your image file will be copied onto your Micro-SD. Eject the Micro-SD card and the operating system is fully loaded and ready for your Raspberry Pi.
Step 2: Now plug all your things into the Raspberry Pi 2
Now that the Micro-SD is ready, plug in a monitor, and have a mouse and keyboard connected, not to mention, the power supply. Now is the time to get serious. Insert your Micro SD card and boot it all up. Let it all start up, and it shouldn’t take more than 15 seconds. You will be at the Raspi-config screen soon enough, on which you will be doing the necessary setups.
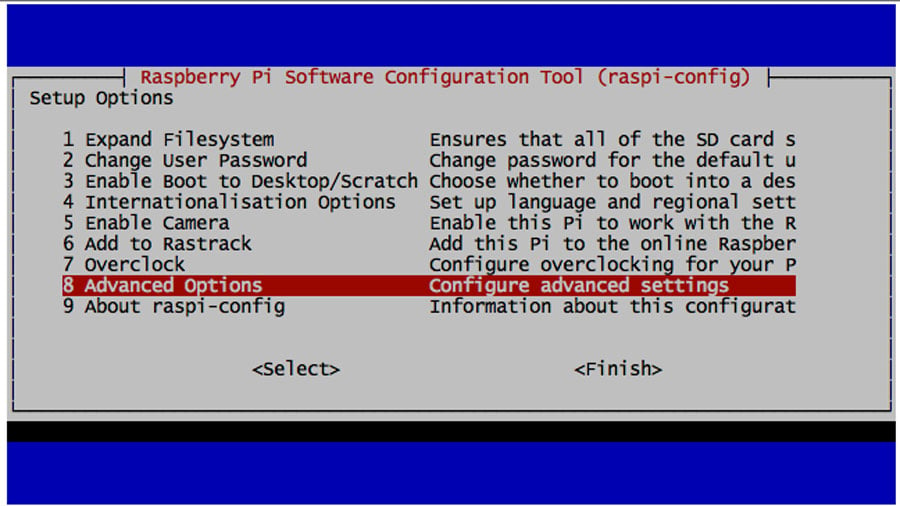
The first thing of importance is to expand the filesystem on your SD card so it will enable the maximum amount of space within. To do this: choose option 1 and press start. An automated process will begin and when it finishes, choose option 8 – Advanced options, and do a (press A4) memory split. Change that value to 16, which means your GPU will have an allocation of 16 MB. This is necessary as you won’t be using much video RAM on your server, for obvious reasons of graphics not being the priority on a server. Next, just press A8 to enable SSH encryption, and you are done. Reboot your Raspberry Pi 2 to lock in your options. It is configured.
Step 3: Log in
Now that your Raspberry Pi 2 is rebooted, you can log in straightaway! The default username is “Pi” and the password is “Raspberry”. After which, it’s time to make sure your Raspberry Pi 2 is updated to the latest firmware. In the LX terminal, type in “sudo apt-get update”. This updating process may take awhile, so it could be a great time to get a coffee and just relax!
Step 4: Get a fixed IP
You will now need to get a fixed ip on your Raspberry Pi 2 now. To do this, you will need to edit the /etc/network/interfaces file to fix the ip address on your Raspberry Pi 2, and make it static instead of dynamic. But you will need to know that address first of all by running “ifconfig” into the LX terminal.
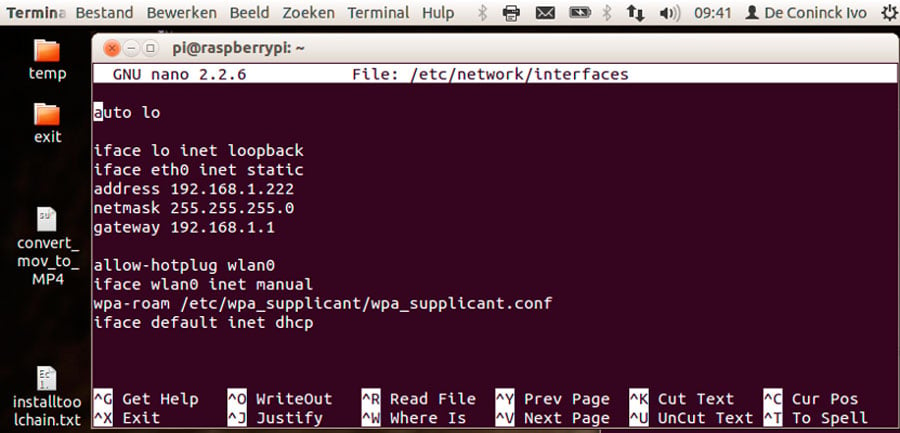
A lot of text will be generated but, as you are using an ethernet connection on your Raspberry Pi 2, you would want to be looking at the eth0 line, usually at the top. The inet addr within this text is the most telling in terms of finding out your IP address. It will be in that obvious format of XXX.XXX.XXX.XXX and follows after “inet addr:” You would also want to run “netstat” to find out your gateway and destination address, also in the same formats. The following step is the main biggie: go into the etc/network/interfaces file via “sudo nano /etc/network/interfaces.”
You will see that your default configuration will show your ethernet “ethO” to be using DHCP (Dynamic Host Configuration protocol). Simply put your Raspberry Pi 2, and it will get an IP address each time it connects to the router.
iFace eth0 inet dhcp
To make the IP address fixed on your Raspberry Pi 2 is essential to making it a server, so towards that objective we will just use the IP address we saw earlier within “ifconfig”. To do that we are only making changes to the “iFace eth0” section. To speed things up, your new section should look like that:
iFace eth0 inet static
the IP address that we wish to use and same as the one in ifconfig
Address 192.168.0.6
this is used to divide IP addresses into subnets, Use this as the standard and it will work for you
Netmask 255.255.255.0
this is the IP address Structure, yours might be 192.168.1.0
Network 192.168.0.0
labeled as BCAST, and found in ifconfig earlier
broadcast 192.168.0.255
the gateway address found in netstat – nr
gateway 192.168.0.1
Once you have inputted all these values, you have officially fixed your addresses and you can now save the changes by inputting CTRL-0 and then CTRL-X to exit.
Step 5: Check your network settings
Reboot your Raspberry Pi 2 now with the above-mentioned sudo reboot command. Log in again and go back into ifconfig. It is easy to see that your IP address is now static instead of being formerly dynamic. To do so, simply check if you have an internet connection first of all. That’s the priority, of course, and Internet access can be easily checked with the ping command: “ping google.com”. If the pings start getting the appropriate feedbacks, it means everything you have done prior was correct. Give yourself a pat.
After this, you no longer need to use the Raspberry Pi 2 directly (although you no longer need to do so), so you can unplug your keyboard and mouse. If you opted to unplug, you can simply log in using SSH on another Linux machine. Both ways would do, but if you go “headless”, all you need to type in on the LX terminal on your remote Linux machine (not the Pi itself) is “ssh pi@IP address”. The IP address in this command has to be the static address you entered earlier, or else you wouldn’t be able to log in from your remote machine. Enter the Raspberry Pi 2 default password after to log in and you will be now be able to issue commands through your remote station.
Step 6: Enable read and write
Your server is now on the Internet, but you will still have to configure it to behave as a server. The important first step towards that task would be to enable Raspbian to read and write on the external USB 2.0 hard drive (if you haven’t plugged that in, now is the best time to do so). If the drive is already formatted for Linux computers- ext4, ext3 or BTRFS- you are good to go from the get-go. But if your drive is still formatted for Windows computers, NTFS namely, you will need to install a tool for enabling read-and-write access. NTFS-3G is the name of the tool to start enabling read-and-write in LXTerminal on your Windows-formatted removable hard drive is “sudo apt-get install ntfs-3g”. After a few seconds, the tool program (also searchable on Google) is install, and you got read-and-write enabled on your computer.
Step 7: Install WebMin
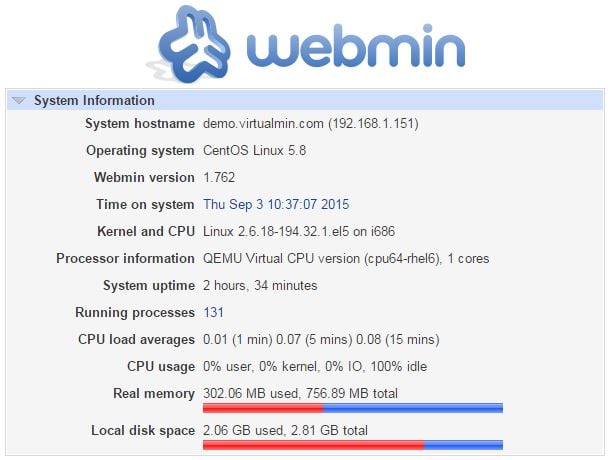
We are almost done creating a fully-enabled Raspberry Pi 2 server here (good job so far), and we have done so using primarily the LX terminal so far. However, this could be extremely limiting in future administration commands. Thankfully, there’s also a tool to help you do more flexible and dextrous functional commands. In fact, you no longer need to grapple with tedious administration commands any more, as you get a graphical interface for the most common administration tasks, such as user management and more. That polished tool is named WebMin and you can certainly find that online for sure. Install it using this command “sudo apt-get install Webmin” and all of the program and its dependencies will be installed in no time.
Now that Webmin is installed, open a new browser window on your computer and simply navigate to the IP address of your Pi, but don’t forget to use the port number 10000. The IP address should look something like that: “192.168.0.6:10000”. Type that into your browser window and you are on your way to enabling Webmin capabilities on your computer. If you encountered a message that the certificate for the “website” isn’t to be trusted. Just click on advanced settings and proceed onwards. The system section, among 8 main features, is where you can manage your drives, users and groups.
Step 8: Mount your drives
One little step before you can start writing and transferring to your drive is to mount your external drive, but you need to head back to your old ‘friend’, the LX terminal. There you will need to create a directory that will act as a share point. In the terminal, navigate to “/media” and create a new directory called “drive”, which will serve as the share point.
CD /Media

Sudo Mkdir drive
Initially, you won’t have the root permissions to access this directory. Only those with root access can do so, but this is really rectified within one line. Change access permissions with this all-important command:
Sudo chmod 770 ./drive
Now you can create a new drive mount within Webmin with your newly-opened user privileges, and that’s when you can fully transition into a graphical interface with full options to configure your now-full-fledged Raspberry Pi 2 server! Enjoy your newly-minted achievement by uploading some media files onto your external hard drive, all within the file explorer. After which, feel free to configure all your users and groups, and everything else in Webmin. And always remember: have fun with all the nuts and bolts along the way!


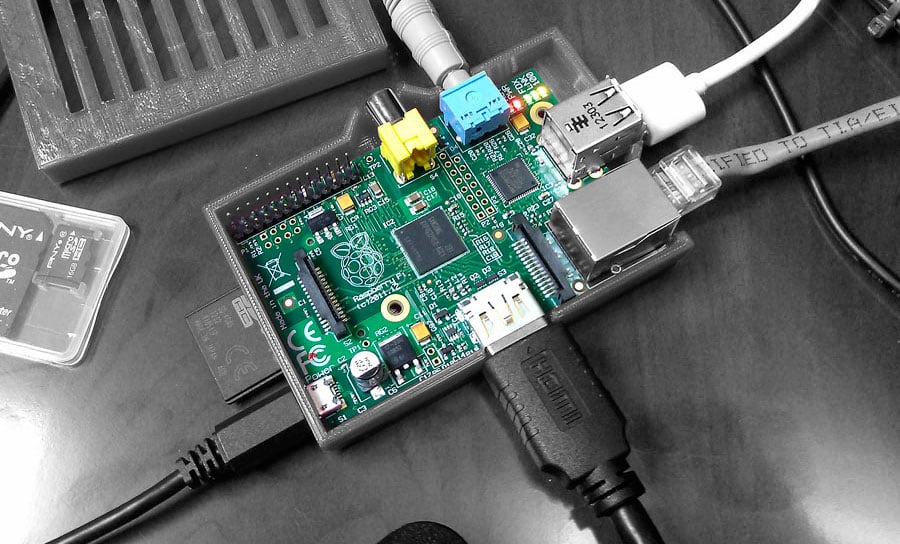



I bought my Raspberry Pi 2 Model B to create my own network storage but ended up using it as a Media Player. The Pi connected to the TV with 500GB of movies (mostly pang bata for my 3-year old daughter). The only accessory I needed was a wifi adapter to use Kodi remote on my Iphone.
With this tutorial, may excuse na ako to buy another Pi!